
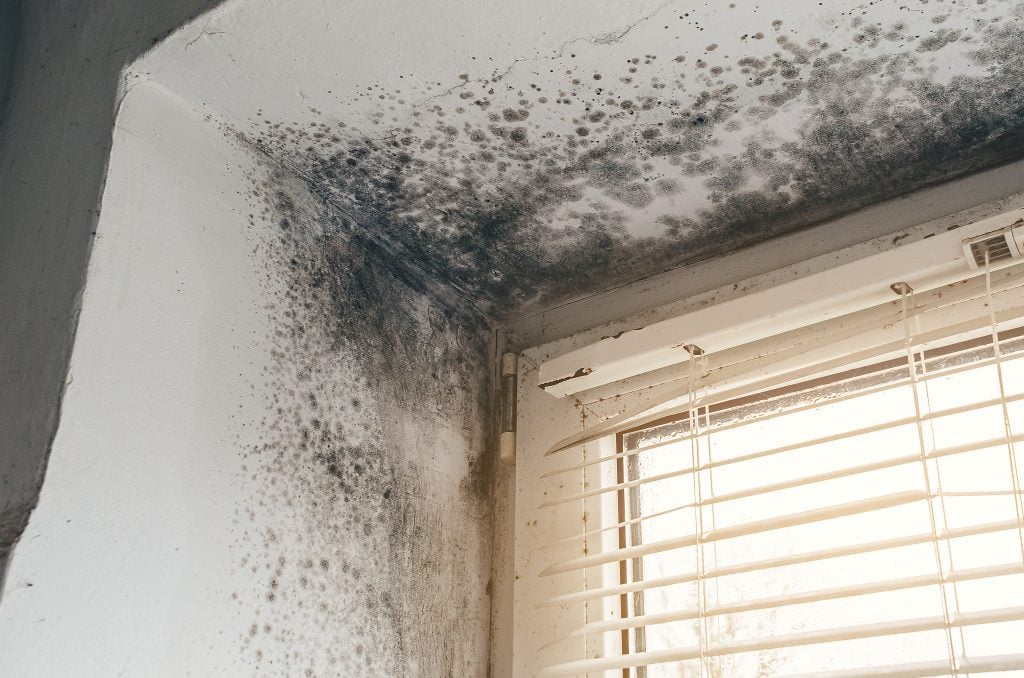
How to Check for Mold After Water Damage: Where to Look and What to Do Next
If you don’t deal with the damp left by water damage quickly enough, you may find yourself dealing with a mold problem. Knowing how to check for mold after water damage starts with understanding where the water traveled, recognizing the warning signs, and checking places where moisture can remain hidden. Here’s how to inspect affected areas safely and decide what to do next.
| What You Will Learn How to protect yourself before you inspect.How to map where the water went.Eight places mold hides after a water event.Which tools actually help, and what they cannot tell you.Why testing is rarely the first step.A simple recheck schedule for the weeks after the water. |
How to Check for Mold After Water Damage
| Stop and Call a Professional if: The water came from sewage or floodwaterYou have asthma, another chronic lung condition, or a weakened immune system. Avoid entering the affected area.Mold covers a large area or appears to extend into hidden spaces. |
Before You Start: Protect Yourself
The most important step is ensuring you are well protected. You should never walk into a wet or moldy area unprepared. The EPA and CDC give the same basic advice:
- Wear an N95 respirator at a minimum. It won’t eliminate all exposure risks, but it should protect you from mold spores better than a paper dust mask or cloth.
- Wear gloves and goggles. Use goggles without open vent holes. Spores and dust can get through vented ones.
- Keep children and pets out of the area until cleanup is finished.
- Do not run the HVAC if you think mold may be near the system or in the ducts. It can spread mold through the house.
- Stay out of electrical hazards. If water has reached your outlets or panel, call an electrician first.
| Stop and call a professional if: The water came from sewage or floodwater. Anyone in the home has asthma, a weakened immune system, or a chronic lung condition. You see or suspect mold across a large area. |
Step 1: Map Where the Water Went
Mold grows where materials stay wet, so you can start by tracing the water. Write down the answers to a few questions:
- Where did the water start?
- Which rooms did it reach?
- What was the flooring and what is under it? Carpet, pad, hardwood, subfloor, concrete?
- How long was it wet before drying began?
- Was the water clean, or could it have been sewage or floodwater?
Water does not stay where it lands. It spreads across floors, wicks up drywall, runs along framing and under baseboards, and can drip into the room below. Once you know the path the water travelled, you should have a pretty good idea of where mold may start to grow.
Take photos and notes. They help with your insurance claim and with any professional who comes to inspect.
Step 2: Use Your Senses
You do not need tools to start. Your eyes, nose, and hands can tell you a lot.
| Sense | What to look for | What it may mean |
| Sight | Stains, dark spots, speckling, fuzzy patches, bubbling paint, peeling wallpaper, warped baseboards. | Moisture is present and mold may be growing. |
| Smell | A musty or earthy odor, stronger in one room or cabinet. | Hidden moisture and possible microbial growth. The EPA and CDC both list odor as a sign. |
| Touch | Soft, swollen, or damp drywall; damp carpet; or swollen baseboards | The material may still contain moisture or have sustained water damage. |
| Change over time | A stain that grows or comes back after you wipe it. | The moisture source is still active. |
Step 3: Check the Places Mold Hides
While following the path the water travelled should lead you to all potential mold growth spots, there are still a few other places mold can hide:

Figure 1. Eight places to check after a water event.
- Attic roof deck and insulation: If the water came from a roof leak or ice dam, you should check the underside of the roof deck and look for dark stains or damp insulation.
- Ceilings below bathrooms and the roof: Water may hide above the ceiling long after a surface looks dry, so keep an eye out for brown rings, sagging, and peeling paint.
- Behind baseboards and at the base of walls: After a water incident, the base of the wall tends to stay wet. If the baseboard is warped or the paint is bubbling, there’s a good chance the drywall behind it is damp.
- Under carpet and carpet pad: If they feel damp or smell musty, check for trapped moisture and signs of mold. Depending on the extent of the damage and the source of the water, the carpet or padding may need to be removed.
- Inside cabinets and vanities: Particleboard swells and darkens when wet, so it’s important to check these areas, especially in the back. Under-sink cabinets are common trouble areas, especially if your plumbing is prone to leaking.
- Behind and under appliances: Dishwasher, washer, and refrigerator leaks can go for a long time without being noticed. Check for dampness and staining around and beneath appliances where you can do so safely. Don’t move connected appliances if doing so could damage a hose, gas line, or electrical connection.
- Basement walls and the rim joist: Foundation walls and wood where your house’s frame meets the foundation can be susceptible to collecting moisture. If you store any boxes or fabrics in your basement, make sure to check them as they’ll usually show signs of mold first.
- Subfloor and floor joists from below: If you can reach a basement or crawlspace, look up at the underside of the floor above the wet room. Dark staining on wood can mean long-term moisture.
For more on where moisture hides, read Where Does Mold Grow in Homes?
Step 4: Use Tools the Right Way
If it’s safe to do so, a few simple tools can reduce the guesswork behind finding mold. None of them can replace a trained inspection, but they help you decide when to call for one.
| Tool | What it tells you | Limits |
| Flashlight and mirror | Shows dark spots in corners, behind appliances, and under cabinets. | Shows only what you can reach. |
| Moisture meter | Shows relative moisture in drywall, wood, and flooring. | Readings are only useful when you compare them to a dry area of the same material. |
| Hygrometer | Measures relative humidity in the room. | Tells you about the air, not about moisture inside materials. |
| Thermal imaging camera | Shows temperature differences that can point to damp areas behind surfaces. | Does not detect mold. It points to where to check with a meter. |
Should You Test for Mold?
Routine mold testing is largely unnecessary when you can already see or smell mold:
- The EPA states that sampling is usually unnecessary if you can see mold, becauseyou already know it’s there.
- The CDC doesn’t recommend routine mold sampling, nor does it deem it necessary to identify the type of mold in your home.
- The Minnesota Department of Health does not recommend testing in most situations. It points people toward finding and fixing the moisture source instead.
It’s not particularly practical to test for mold. Spores are in every home, and finding them isn’t going to tell you whether you have a moisture problem. There is also no health-based standard for how much mold is safe.
| Inspection | Testing |
| Finds the moisture source and the wet materials. | Counts or identifies spores in a sample. |
| Guides what to dry, clean, or remove. | Does not tell you what to do next by itself. |
| Uses meters, thermal imaging, and a visual check. | Needs a plan from a qualified professional to be meaningful. |
| Recommended first step. | Rarely needed. May help in specific situations, such as a dispute or a documented health concern. |
Step 5: Recheck on a Schedule
Mold doesn’t always show up on the first day, so a single check isn’t enough. Once you’ve located the potential spots for mold, keep checking on them until you’re sure the affected materials are dry and the moisture problem has been resolved.
| When to Recheck for Mold | What to do |
| Daily for the first week | Check the wet area for odor, new stains, and damp spots. Read your hygrometer. |
| Weekly for weeks 2 to 6 | Recheck hidden spots from the list above. Look for stains that return. |
| After the next heavy rain, snowmelt, or thaw | Recheck basement walls, the rim joist, and any previously wet areas. |
| Any time you notice a new odor | Investigate right away. |
What to Do With What You Find

Figure 2. What to do after your check, based on what you find.
If you find mold on a hard surface, you should be able to handle it yourself by following a few basic steps:
- Wear an N95 respirator, gloves, and goggles.
- Fix the moisture source first.
- Scrub the mold off the hard surface with detergent and water. The EPA doesn’t recommend routine bleach use for mold cleanup. If you use bleach, follow the product instructions, ventilate the area, and never mix bleach with ammonia or other cleaners.
- Dry the surface completely.
- Do not paint or caulk over mold. Paint applied over mold will likely peel, and the mold will return.
If you find mold on a porous material, it’s time to call a professional. The EPA notes that porous materials like ceiling tiles and carpet may need to be thrown away because mold grows into them and is hard to remove completely. For large areas, the EPA points to professional remediation guidance.
What a Professional Check Includes
When you call a restoration company, a good inspection goes beyond a quick look. Expect the following.
- A walk-through and history: The technician should ask where the water started and how long materials were wet.
- Moisture mapping: Readings across walls, floors, and ceilings, compared with a dry reference.
- Thermal imaging: A camera shows temperature differences that suggest hidden moisture.
- Air and surface conditions: Temperature and humidity readings in affected and unaffected areas.
- A written scope: A clear list of what to dry, clean, or remove.
Dryco performs these checks as part of every water and mold job in Duluth. See our mold remediation service and water damage service pages. If you are not sure whether you need remediation, read Do I Need Mold Remediation?.
Frequently Asked Questions
Q: What does mold look like after water damage?
It varies. It can look fuzzy, speckled, slimy, or like dark staining. Colors can range from white to green to black, but you don’t need to try identifying the type by color. The CDC says you don’t need to know the type to decide what to do.
Q: Can I use a home mold test kit?
You can, but it is rarely helpful. Spores are present in every home, and a positive result doesn’t tell you whether you have a moisture problem. Public health agencies recommend finding and fixing moisture instead.
Q: How do I check inside a wall without cutting it open?
A moisture meter and a thermal camera can often show damp areas through the surface. A professional can also make small inspection openings to check the cavity. That keeps damage to a minimum.
Q: Should I check my HVAC system?
If you think mold may be in the ducts or near the system, do not run it. The EPA advises consulting its guidance on air ducts before taking further action, and a professional can help assess it.
Q: How long should I keep checking?
Check daily for the first week and weekly for about six weeks. Recheck after the next heavy rain, thaw, or snowmelt. Moisture problems often come back when conditions change.
Q: What if I find mold and I am renting?
In Minnesota, landlords are generally responsible for maintaining their properties and addressing moisture problems that cause mold. Tenants should report leaks and mold as soon as they’re aware of them, preferably in writing. The responsibility for specific problems can depend on the circumstances and applicable housing requirements.
Resources
Dryco:
Where Does Mold Grow in Homes?
External:
EPA: Mold Cleanup in Your Home
EPA: Frequent Questions About Mold
Minnesota Department of Health: Mold in HomesUniversity of Minnesota Extension: Controlling Moisture Problems