
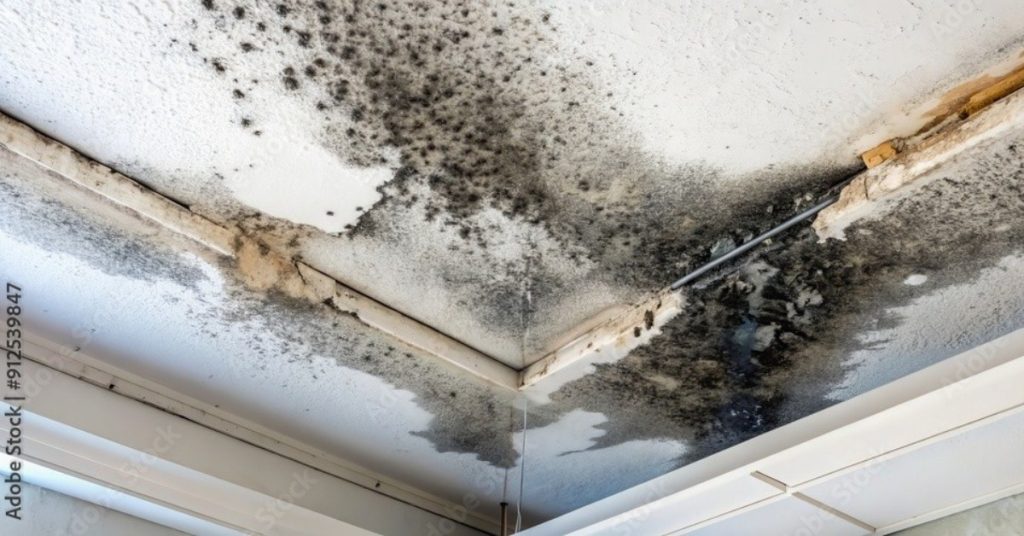
How to Prevent Mold After Water Damage: A Step-by-Step Drying and Humidity Plan
You can’t remove mold spores from your home, but you can stop them from growing. That’s the key to preventing mold after water damage. Take away the moisture, and mold has nothing to work with.
Prompt drying, ideally within 24-48 hours, is critical when reducing the risk of mold growth.
| The goal in one line Get the materials dry, not just the surface, and keep indoor humidity in a safe range until you have proof that everything is dry. |
The Plan at a Glance
Timing drives everything. This table shows what to do and when.
| When | What to do | Why it matters |
| Hours 0-2 | Make the area safe. Stop the water source. Take photos. | Stops more water from entering. Protects your claim. |
| Hours 2-24 | Remove standing water. Remove soaked porous materials. Start air movement and dehumidification. | Quick action during this window helps reduce the risk of mold growth. |
| Days 1-3 | Keep drying. Open cavities if needed. Measure moisture daily. | Materials dry from the inside out. Surface checks miss the rest. |
| Days 3-7 | Confirm materials reach dry readings. Clean salvageable hard surfaces. | Equipment should not come out until your affected materials meet their drying goals. |
| Weeks 2-6 | Watch humidity. Recheck hidden spots. | Mold can still appear if moisture was left behind. |
Step 1: Stop the Water
If it’s safe to do so, you need to stop or slow the water source first. Shut off the water at the fixture or the main valve. If it came from the outside, such as a roof leak, ice dam, or groundwater, protect the opening and call for help.
If the water is sewage or floodwater, stop. Do not try to dry it yourself. Contaminated water needs a professional with the right equipment and protection.
Step 2: Remove the Standing Water
Standing water can quickly saturate nearby materials, so you need to remove it as soon as it is safe to do so.
- Small, clean spills: towels, mops, and a wet-rated vacuum can work.
- Larger spills or water near electrical equipment: use professional extraction. A household vacuum can create an electrical hazard.
- Do not walk through standing water if you cannot rule out electrical risk.
Step 3: Decide What Stays and What Goes
While some water-damaged materials can be dried and salvaged, others need to be replaced to prevent further problems. The EPA warns that porous materials can be difficult or impossible to clean once mold grows into them. The CDC advises throwing away items soaked with flood water that cannot be cleaned and dried within 24 to 48 hours.

Figure 1. A simple decision path for any material that got wet.
| Material | What to do | Replace if |
| Carpet and backing | Extract water with a water extraction vacuum. Dry within 24 to 48 hours. Check that the underfloor is dry. | It cannot be dried thoroughly, or the water was contaminated. |
| Carpet pad | Usually treated as disposable after water damage. | Nearly always. It is difficult to dry it thoroughly. |
| Upholstered furniture | Extract water. It can be hard to dry fully within 48 hours. | It cannot dry quickly. For valuable pieces, ask a specialist. |
| Finished wood furniture | Clean with mild detergent and clean water. Dry. | It stays swollen or shows growth. |
| Books and papers | The EPA suggests freezing or freeze-drying valuable items to stop growth until they can be treated. Discard low-value items. | They show growth. |
| Insulation | Remove wet insulation in wall and floor cavities. | Saturated or contaminated. |
| Drywall | May be dried in place if the water was clean and the response was fast. A professional should check inside the cavity. | It stayed wet past the window, feels soft, or the water was contaminated. |
| Hardwood flooring | Needs specialized drying, often with floor drying mats. | It continues to cup, buckle, or show growth. |
| Concrete, tile, metal, glass | Clean with detergent and water. Dry completely. | Rarely needed. |
Dryco does not do reconstruction. When materials must be removed, we take out what is needed for drying and safety, and document the scope. Your licensed contractor handles the rebuild.
Step 4: Move Air and Pull Moisture Out
Wet materials release water into the air as vapor, but if that vapor has nowhere to go, it settles back into the house. You need two things: air movement across wet surfaces, and a way to remove the moisture from the air.
- Fans move air across surfaces and speed up evaporation. Just don’t blow air across visible mold because this can spread spores.
- A dehumidifier removes that water from the air to prevent increased humidity indoors.
- Use outdoor air only when it is drier than indoor air. In Duluth winters, outdoor air is often very dry. In humid summer weather, keep your windows closed and rely on the dehumidifier.
- Heating can speed up evaporation, but the moisture still needs somewhere to go. That’s why it’s usually necessary to have a dehumidifier on hand or to ensure the affected area is well ventilated.
Depending on the extent of the issue, it can take a lot to restore water damage properly.
Step 5: Check Hidden Spaces for Moisture
It’s a lot easier for surfaces to dry than hidden cavities. If you leave wet drywall, insulation, or framing sealed, mold can start where you cannot see it.
- Remove baseboards so air can reach the base of the wall.
- Open cabinet doors and drawers and pull out contents.
- Lift or pull back carpet to check the pad and subfloor.
- Let a professional decide about cutting into drywall. Controlled openings, like removing the bottom few inches, can let a wall dry faster.
You can check these areas, but make sure that you contact a professional to assess any problems before the materials are removed.
Step 6: Clean What You Keep
Salvageable hard surfaces should be cleaned. The EPA advises scrubbing mold off hard surfaces with detergent and water, then drying completely. That also applies to surfaces that were wet but are not yet moldy. Water can leave behind dirt and bacteria.
If the water was contaminated, professionals may apply EPA-registered antimicrobial products as part of the job. That is not the same as using bleach to kill mold. The EPA doesn’t recommend routine use of biocides for mold cleanup. Instead, it emphasizes removing the mold and resolving the moisture problem.
Step 7: Prove It Is Dry
Touch is not proof. A wall can feel dry on the surface and still hold water inside. A moisture meter helps bypass the guesswork.
Professionals follow the IICRC S500 standard. It defines a dry standard as a reasonable estimate of the material’s moisture level before the water event. A drying goal is the target moisture reading set for the end of the job. Readings are recorded daily and the plan is adjusted if the numbers stall.
If you are drying on your own, do the same in a simple way.
- Take a reading in an unaffected area of the same material.
- Take readings in the wet area each day.
- Keep drying until the wet area matches the reference.
- Write down the numbers and the dates.
Step 8: Keep Humidity in Range
Even after materials are dry, high humidity can bring problems back. The Minnesota Department of Health recommends keeping indoor humidity between 20 and 40 percent in winter and below 60 percent the rest of the year. The University of Minnesota Extension notes that moisture problems may occur when the indoor humidity is above 50 percent.

Figure 2. Indoor humidity targets from Minnesota guidance.
A basic hygrometer costs little. Place one in the basement and one in the main living space. Check them weekly. If readings climb, run a dehumidifier in summer or reduce moisture sources in winter.
Mistakes That Bring Mold Back
| Mistake | Why it fails | Do this instead |
| Drying only the surface | Water stays in the pad, cavity, and framing. | Dry the materials and confirm with a meter. |
| Painting or caulking over damp or moldy areas | It does not fix the underlying moisture problem. | Clean, dry fully, then repaint. |
| Closing the wall too early | Trapped moisture feeds mold in the cavity. | Wait for dry readings before closing. |
| Relying on bleach alone | Does not remove moisture and cannot fix porous materials. | Remove moisture. Remove porous materials that cannot be saved. |
| Running the HVAC with wet or moldy ducts | Can spread mold through the house. | Keep it off until the wet or mold-contaminated ducts have been inspected and addressed. |
| Pulling equipment too soon | Materials look dry before they are. | Keep drying until readings reach the goal. |
| Ignoring the source | More water means more mold. | Fix the leak, roof, grading, or drainage problem. |
Long-Term Prevention
Once you are through the crisis, there are a few steps you can take to lower the odds of a repeat.
- Test your sump pump before spring thaw and heavy rain.
- Check hoses and connections on washers, dishwashers, and refrigerators every year.
- Clean gutters and extend downspouts so water drains away from the foundation.
- Use bathroom and kitchen exhaust fans every time you shower or cook.
- Consider water leak sensors near water heaters, sinks, and washers.
For more, read How to Prevent Water Damage and Mold Prevention in Homes.
When to Hand It Off to a Professional
Call a professional if any of these are true.
- The water was sewage or floodwater.
- Water reached inside walls, under flooring, or above ceilings.
- More than a small area is wet.
- You cannot get materials dry within 24 to 48 hours.
- You see or smell mold and are unsure how far it goes.
Dryco handles water mitigation and mold remediation in Duluth and the surrounding region, 24/7. See our water damage service and mold remediation service, or contact us now.
Frequently Asked Questions
Q: Is a fan enough to prevent mold after water damage?
For a very small, clean spill on a hard surface, a fan may help. For anything that soaked into carpet, drywall, or flooring, fans alone are not enough. You also need dehumidification and a way to confirm the materials are dry.
Q: How long should I run a dehumidifier?
There isn’t a set number of days for dealing with moisture after water damage. Keep drying the affected materials until they meet their drying goals. Afterward, you can use the dehumidifier as needed to control the indoor humidity.
Q: Can I save my carpet after water damage?
Sometimes. If the water was clean and the carpet is extracted and dried within 24 to 48 hours, it may be saved, though the pad usually cannot. If the water was contaminated, replacement is usually the safest choice.
Q: Should I spray anything on wet materials to prevent mold?
The EPA does not recommend routine use of biocides. Drying is the fix. In some situations, such as contaminated water, professionals may apply antimicrobial products as part of a larger process.
Q: What humidity should I aim for after water damage?
The Minnesota Department of Health recommends 20 to 40 percent in winter and below 60 percent the rest of the year. Many people aim lower in summer. A hygrometer will tell you where you are.
Q: Will my insurance cover drying?
Many policies cover mitigation after sudden and accidental water damage and expect you to take reasonable steps to prevent further harm. Policies differ. Call your agent early and keep records. See our resource on property claims.
Resources
Dryco:
External:
EPA: Mold Cleanup in Your Home
EPA: Flood Cleanup to Protect Indoor Air and Your Health
CDC: Mold, Testing, and Remediation
Minnesota Department of Health: Mold in Homes
University of Minnesota Extension: Controlling Moisture ProblemsIICRC: Standards for Water Damage and Mold Remediation